Custom Insert Molding Company In China
Maximize Your Savings with the best Insert Injection Molding Solutions
- Trusted
- Experienced
- Professional
China Plastic Insert Molding Expert
Stebro Mold is a full service custom insert injection molding supplier in China. We use Engel injection molding machine to produce high-quality insert-molded plastic components. You won’t have to contact multiple mold manufacturers and insert injection molding companies when you work with us. You can have the advantage of a single-source plastics provider from idea to shelf.
Our services include:
- 2D & 3D product design and optimization
- The material selection
- Rapid prototyping services
- Cost-effective insert mold solution
- Mold Flow Analysis to optimize the mold design
- In-house insert mold manufacturing, mold change, mold trial, tooling transfer and maintenance
- Insert Molding and Overmolding Services
Plastic Assembly
We’re here to make sure your projects are a success! With our help, you’ll get insert molded parts done correctly from the start, within your budget, and on time.
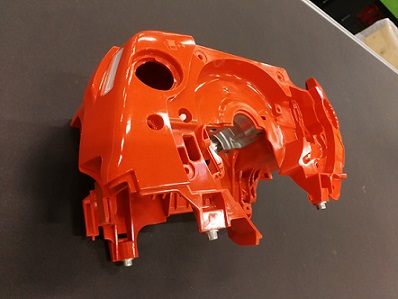
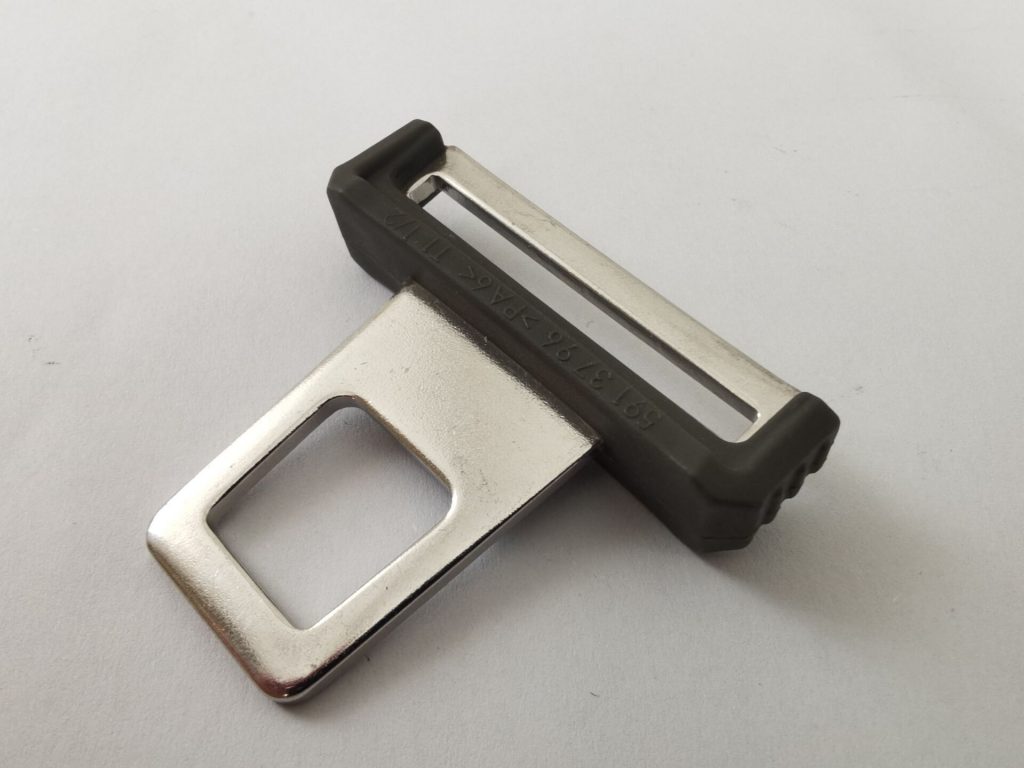
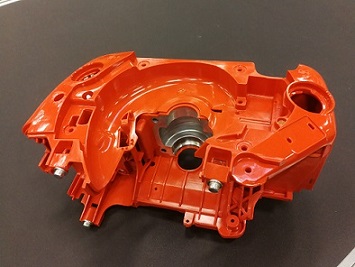
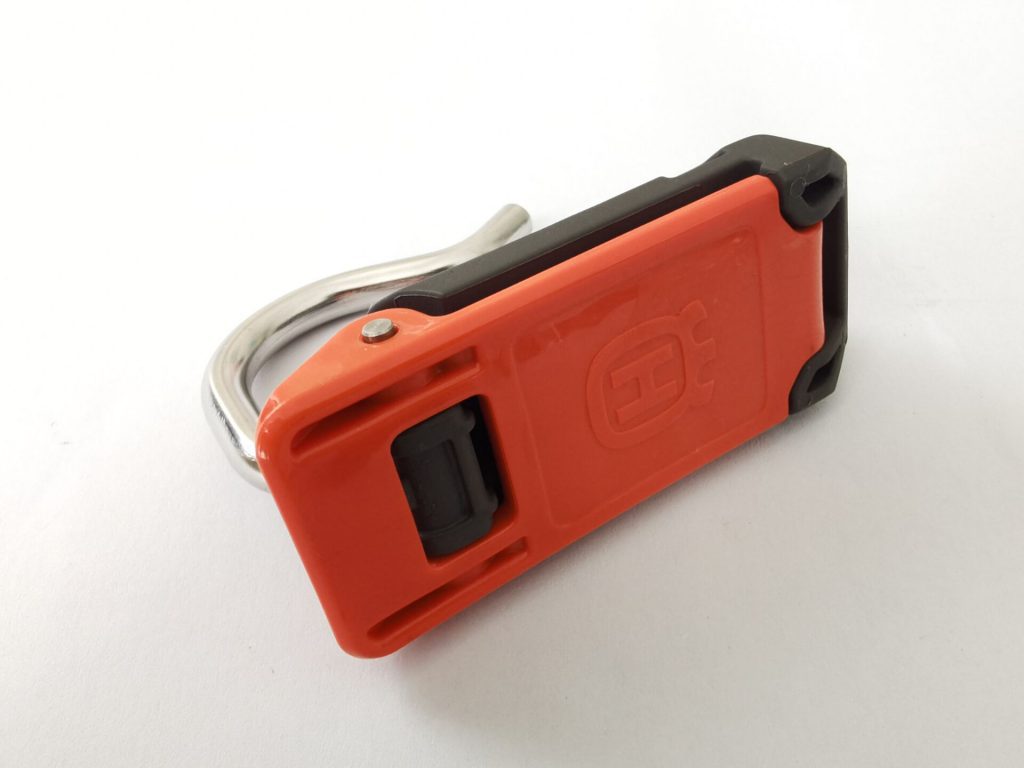
insert molding Showcase
Why Stebro Mold for insert molding services
- Free Insert Molded Plastic Part Design Assistance
- Mold design optimize with Moldflow to improve the surface and reduce cost
- In-house Insert Mold Manufacturing
- Procurement or manufacture of metal inserts
- Mold Life Guarantee, Free Mold Maintenance
- Affordable Price, No Hidden Charges
- Quality Control In Manufacturing, Consistent Quality
- On Time Delivery
- 24-Hour Quote Responses With DFM Feedback
- Engel Vertical Injection Molding Machine
What is Insert Moulding?
Insert molding is a specialized plastic injection molding process where pre-manufactured inserts (usually metal or ceramic inserts) are placed into the mold, then inject molten thermoplastic around the inserts to create a single, integrated part.
It can reduce assembly time and cost, as well as improve the strength and functionality of the final product.
Insert Molding Process
- Preparing the inserts: The metal inserts are cleaned and prepared for integration with the plastic material. Depending on the application, surface treatments or coatings may be applied to improve adhesion.
- Mold setup: Ensure that the mold is clean and free of any debris or contaminants.Install the insert mold into the injection molding machine and verify that it is properly aligned and secured. Configure the machine settings, such as temperature, pressure, and injection speed, according to the requirements of the specific plastic material and insert being used.
- Positioning the inserts: Manually or automatically place the prepared inserts into the designated areas within the mold cavity. Ensure that the inserts are accurately positioned and secured to prevent movement during the molding process.
- Injecting the plastic: Inject the molten plastic resin into the mold cavity, ensuring that it flows around and completely encapsulates the inserts.
- Cooling and solidification: The plastic cools and solidifies around the insert, creating a strong bond between the materials.
- Ejection: Once the plastic material has fully solidified, carefully open the mold to release the part. Utilize an ejection system, such as ejector pins or a stripper plate, to ensure smooth part removal without damaging the plastic or dislodging the inserts.
- Inspect the finished parts for quality and consistency: Examine each part to ensure proper insert placement, bonding, and overall part quality. Perform any necessary quality control tests or measurements to verify that the parts meet the required specifications.
- Post-Processing (if necessary): Trim any excess plastic material such as sprue remnants from the parts. Conduct any necessary secondary operations, such as painting, surface finishing, or assembly, depending on the specific application requirements.
Insert Moulding Advantages
- Improved precision
- Increased design flexibility
- Reduced assembly and labor cost
- Enhanced functionality
- Improved strength and durability
Insert Moulding Disadvantages
- Complex process
- Limited material options
- Challenges with insert placement
- Increased risk of defects
- Higher tooling cost
Insert Molding Application
Insert injection molding is widely used across industries to produce strong, multi-material parts that combine the benefits of metal and plastics. This process eliminates secondary assembly, improves part strength, and ensures better part alignment and aesthetics.
Automotive Industry
- Threaded mounts and bushings
- Sensor housings
- Seatbelt components
- Control switches and knobs
Medical Devices
- Surgical instruments with metal tips
- Catheter hubs
- Diagnostic device housings
- Implantable components with embedded markers
Consumer Electronics
- USB connectors
- Power plugs
- Audio jack enclosures
Industrial and Power Tools
- Tool handles with metal cores
- Fastening points with threaded inserts
- Knobs and grips for industrial equipment
Home Appliances & Consumer Products
- Appliance control panels
- Plastic covers with embedded switches
- Handles with metal reinforcement
Electrical & Lighting Components
- Switchgear components
- Terminal blocks
- Connector housings
Insert molding design guide
Why Insert Molding Design Matters
Designing for insert molding requires careful consideration of:
Material Bonding and Adhesion
Mechanical bonding between plastic and insert
Mold design and alignment
Insert retention features
Process flow and stress distribution
Poor design = part failure, loose inserts, or high scrap rates.
Design considerations in Insert Mold Design guidelines
Define the purpose of the insert
Is the insert for mechanical strength, electrical conductivity, heat resistance, wear resistance or alignment?
Then we can know the insert material, surface finish and required bonding strength.
Select Insert Materials Compatible with Plastic Resins
Brass: Excellent for threaded inserts, high conductivity.
Stainless Steel: Corrosion-resistant, ideal for structural strength.
Aluminum: Lightweight but requires surface treatment.
Ceramics: Electrical insulation or medical use.
Match plastic resin and insert material based on shrinkage, thermal expansion and bonding properties.
Design Insert Retention Features
To ensure inserts stay locked inside the plastic, you have to add knurling, undercuts, grooves, flanges, cross-holes, or flat sections for anti-rotation.
You have to avoid smooth cylindrical inserts, they can slip out or rotate under load.
Shrinkage Factor for Plastic Materials
Plastic shrinkage must be factored into insert mold design, especially when inserts are rigid and immovable.
Maintain consistent wall thickness to control shrinkage around inserts.
Minimize sharp corners near inserts to avoid sink marks or internal stress.
Shrinkage mismatch between plastic and insert can lead to cracks or delamination.
Geometry Guidelines for Insert and Plastic
Keep walls uniform (2.0–3.5 mm) to avoid hot spots and warping.
Minimum plastic cover over insert: >0.5–0.8 mm
Bosses or ribs should be no more than 60% of wall thickness to prevent sink.
For the inserts, add features like: Knurled surfaces, under-cuts, retaining grooves or holes Flats to prevent rotation.
Insert Loading: Manual vs Robotic
For automation, design inserts with features for robot grippers or magnetic loaders. Use error-proofing (Poka-yoke) systems to ensure correct orientation.
Insert Placement and Retention in the Mold
Retention Methods:
Precision cavities or pockets to hold inserts
Spring-loaded pins for flexible seating
Vacuum channels or magnetic fixtures
Overhead pins to support inserts vertically
Positioning:
Avoid placement near gates or ejector pins.
Ensure insert flatness and perpendicularity—even slight tilt can cause short shots or parting line issues.
✔ Important: Inserts must not float, shift, or tilt during high-pressure injection—secure seating is critical.
Mold Design: Feeding, Cooling, Ejection, and Venting
Feeding (Gate Design)
Use hot runners or sub-gates to direct flow smoothly around inserts.
Position gates to balance fill and avoid weld lines near insert interfaces.
Cooling System
Inserts absorb heat → localized hot spots.
Use dedicated cooling lines near inserts.
Mold temperature control is critical for dimensional stability and bonding strength.
Ejection System
Avoid ejector pins beneath inserts—can cause part distortion.
Use ejector sleeves or air ejection if needed.
Part must release without pulling the insert out—design for draft angles and smooth shut-off surfaces.
Venting
Trapped air near insert = burn marks or short shots.
Add vents at: Insert interface zones Far ends of flow path Thin-wall sections
✔ Best Practice: Run Moldflow or similar simulations to fine-tune gate placement, venting, and cooling channels.
Insert Injection Molding Cost
Insert plastic molded component cost=molding materials cost + insert costs + injection molding cost
There are some ways to lower the cost:
- Reduce the material cost
- Optimize the mold design to shorten the molding cycle times
- Increase the cavity number in the mold.
- Working with a full-service insert injection molding company
Insert Molding Machine
- Horizontal Molding Machine
- Vertical Molding Machine
Insert Molding Inserts
- Brass, blinded threaded, threaded steel parts, threaded inserts for plastic molding
- Steel, stainless steel, screw machine parts, CNC machining parts, metal stamping parts for injection molding inserts
- Photochemical etched parts, cold-headed parts, die-casting part
- Insulated wires, flexible circuits, lead frames, ceramic, and composite insulators